What if a few simple touches could make your fireplace the warmest corner of your home this valentine day? I ask that because small choices—soft pastels, vintage finds, and a playful garland—can change a room’s mood overnight.
I’ll show you how to build a valentine mantel that feels both nostalgic and fresh. Think conversation-heart garlands, bows, eucalyptus, and Wedgwood pieces layered with candles.
Start with a strong center, layer textures, and step back to tweak balance. That approach keeps the look inviting day and night. I use thrifted brass holders and Dollar Tree crafts with smarter placement, so style doesn’t drain your budget.
This short guide blends practical DIYs and vintage soul. By the end, you’ll have clear ideas and the confidence to edit until the mantel tells your story of warmth and love.
Key Takeaways
- Anchor with a focal piece and build around it.
- Layer varied heights and textures for balance.
- Use budget hacks: repurpose, shop sales, and DIY accents.
- Bridge seasons with neutral greenery and wood beads.
- Edit by stepping back—less is often more.
Understanding the goal: a warm, inviting Valentine Mantel that beats the winter blues
You don’t need big changes to chase away the January gray—small accents do the heavy lifting. I aim to help you create a valentine day mantel that lifts mood in midwinter with a cozy glow, soft pastels, and a calm, collected look.
Gentle colors—soft pinks with hints of pastel purple, yellow, and green—bring the cheerful vibe of conversation hearts without feeling heavy. Candles, a few stems of florals, and a simple garland add warmth and life fast.
Read the room first. Match your additions to wallpaper, wall paint, or trim so the palette harmonizes rather than competes. That keeps the overall home decor intentional and easy on the eye.
- Keep winter greenery and wood beads for continuity.
- Add small pastel hearts, bows, and a single sentimental item.
- Prioritize warmth (candles), life (greens), and feeling (a heart or two).
The valentine day mantel is a compact stage—edit until it feels quietly romantic and right for the room. I promise: a handful of thoughtful pieces gives big impact with little effort.
Plan your mantel like a pro: focal point, balance, and scale
Start your plan with a confident center—something that grabs the eye and sets the mood.

I always measure first. Tape the shelf depth and mark sightlines on the wall so nothing juts out or disappears above eye level. That tiny step saves awkward placement later.
Measure your mantel and sightlines
Measure shelf depth and wall width. Use painter’s tape to map the top edge of a garland or the highest item.
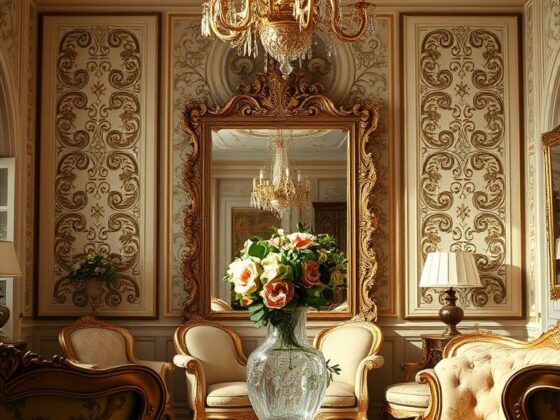
Choose a focal point: mirror, sign, layered art, or vintage window
Pick a confident center: a mirror to bounce light, a crisp sign for farmhouse charm, layered art, or a vintage painted window for patina and story. A vintage window makes a charming focal point that reads like history.
Create height on the ends for visual balance
Build height on both ends—not strict symmetry. Stack books under candlesticks, add tall greenery, or group a vase and frame so each end reads with equal visual weight.
- Big to little: place larger items first, then medium, then small.
- Think in thirds: center, supportive ends, and a bridged midspan.
- Adjust: rearrange until colors, heights, and weights feel balanced.
| Step | Why it matters | Quick tip |
|---|---|---|
| Measure shelf & wall | Prevents overcrowding or lost pieces | Use painter’s tape to mock placement |
| Pick a center | Gives the whole display a focal point | Choose mirror for light, window for story |
| Add end height | Creates balance without twins | Stack books to fine-tune heights |
Set your color palette inspired by conversation hearts
Let conversation-heart colors guide your choices so the shelf reads light, playful, and calm. I pull from soft pinks, lilac, mint, and butter yellow. These hues feel cheerful without overwhelming a room.
Match swatches to your wallpaper or wall paint. Do this in morning and evening light. Undertones change how a color sits next to trim and textiles.
How to spread color evenly
Disperse reds and pinks so one side doesn’t visually tip. Place saturated pieces near the center and fade out with paler items toward the edges.
- I pick two hero shades (blush and soft peach) and two supporting pastels (mint and lilac) for balance.
- Hold small objects or swatches up to the wall to check undertones.
- Choose one metal—gold or silver—to keep the palette cohesive.
- Use wood and eucalyptus to ground the sweetness.
| Goal | Why it works | Quick action |
|---|---|---|
| Two hero shades | Gives the display a clear identity | Pick blush + soft peach |
| Support with pastels | Adds depth without clutter | Use mint + lilac accents |
| 60-30-10 rule | Keeps color balanced | 60% soft pinks/whites, 30% pastels, 10% accent |
| Metal choice | Sets overall mood | Stick to gold or silver |

Keep the finish light and airy. The right colors make a valentine day mantel feel thoughtful and effortless in any home decor.
Build a cozy foundation: mirrors, greenery, and bead garlands
Begin with light and texture so accents land with purpose. I start by cleaning a mirror and leaning it as the room’s light bouncer. A mirror brightens the shelf and gives depth without fuss.
A lush eucalyptus strand softens the shelf edge and adds life. Next, I drape a neutral wood bead garland in a gentle swag. Place beads so they cross the mirror’s lower edge; that visually stitches the whole display together.
Mix finishes—satin ribbon, unfinished wood, and glass—to keep the decor layered, not flat. Add a vintage brass holder or milk glass piece for warmth. If your mantel is narrow, tuck short eucalyptus segments so the look stays tailored.
- Why it works: the base carries color and texture from winter into valentine day styling.
- Quick tip: use what’s already in your home—it saves time and money and looks deliberate.
| Element | Role | Quick placement tip |
|---|---|---|
| Mirror | Bounces light; anchors view | Lean slightly behind center piece |
| Eucalyptus | Softens shelf edge; adds green life | Tuck short segments for narrow shelves |
| Wood bead garland | Adds texture and seasonal nod | Cross lower mirror edge to connect display |

This quiet base makes mantel decor feel cohesive. It gives you a steady place to swap in hearts, bows, or flowers while the bones stay steady.
DIY conversation heart garland step by step
A string of painted foam hearts feels homemade and polished when you follow a few careful steps. I keep this project simple so anyone can finish it in an afternoon.
Materials I use: styrofoam hearts, pastel paints (Shy Smile, Flamingo Feather, Corn Stalk, Back to Nature, Tinted Ice, Wing Flutter), Cricut gold vinyl, transfer tape, drill, loop turner, yarn, and a scrap board.

Quick how-to
- I paint each foam heart in candy-inspired pastels and let them fully cure so the vinyl adheres flawlessly.
- In Cricut Design Space I size short phrases—“Be Mine,” “Love You”—then cut from gold vinyl, weed, and apply transfer tape carefully.
- Drill a clean pilot hole through each heart at low speed to avoid tear-out; protect your table with a scrap board.
- Use a loop turner to pull yarn through, knot behind each heart, and space evenly for a neat swag.
| Item | Role | Tip |
|---|---|---|
| Styrofoam hearts | Base for paint and vinyl | Let paint cure fully |
| Gold vinyl | Adds shimmer and readable text | Size for distance; weed carefully |
| Drill & loop turner | Create clean holes & ease threading | Low drill speed; knot to lock spacing |
| Yarn or thin wire | Hangs the garland | Match yarn color to palette |
Personalize it: mix classic lines with nicknames or dates written in gold. For a valentine day touch, tuck a paper note behind a heart so the garland reads both pretty and personal.
Bow magic: trending bow garland and oversized statement bow
A ribboned flourish changes the whole mood—sudden charm with very little effort. I use bows to add movement, texture, and a touch of craft to a simple shelf.
Quick bow garland
Fast garland with store-bought hair bows
For a speedy win, hot glue the ends of hair bows together and clip them to yarn with a slip knot. Pre-mark your yarn so spacing stays even. Slip knots let you tweak placement once it hangs.

Sew a large fabric bow for above the mirror
Cut three 6″ x 36″ pieces on the fold (two tails, one loop) and a 4″ x 8″ center band. Notch the tails, sew one side, turn, and press. Add a 5″ x 36″ interfacing loop and 5″ x 33″ tails for body.
Interfacing, wiring, and hanging for structure
Accordion-fold the loop and cinch with floral wire to get that signature pinch. Attach wired tails behind the loop so they drape naturally. Wrap the middle band, secure with hot glue, and add a small wire loop for hanging.
- I love a fast win: hair bows plus glue make a charming garland in under 20 minutes.
- Accordion-folding and floral wire give the bow spring and shape.
- A hint of gold thread along edges elevates the piece without stealing attention.
Layer vintage pieces for soul and story
Old things carry small histories that make a shelf feel lived-in and sincere. I like to begin with a cluster of authentic finds near the center to anchor the whole look. That gives a clear place for eye-catching items and lets smaller accents echo outward.
Display vintage Valentine cards in petite brass photo holders. I source old cards and stand them like mini gallery prints so the artwork reads as intentional. Let patina stay—don’t over-polish the brass; the soft glow pairs beautifully with pastels and greenery.
Milk glass, Jasperware, and a brass cherub
Milk glass vases add milky texture and useful height. I use the tin-foil trick around candle bases so votives sit snug and safe inside vintage vessels.
Pink Wedgwood Jasperware—think a heart-shaped trinket box, a small vase, and a candlestick—brings refined nostalgia. Layer the pieces: box, then vase, then candlestick to tell a collected story.
A tiny brass cherub or a wax-seal charm adds a wink of romance. Place it where it can be discovered—on top of a stack of old books or beside a jar of seeds.
- I cluster vintage pieces near the focal area to ground the display.
- Mix eras—mid-century clock next to Victorian cards—to keep the arrangement curated, not costume-y.
- One or two well-placed antiques make the whole shelf read like it’s been loved for years.
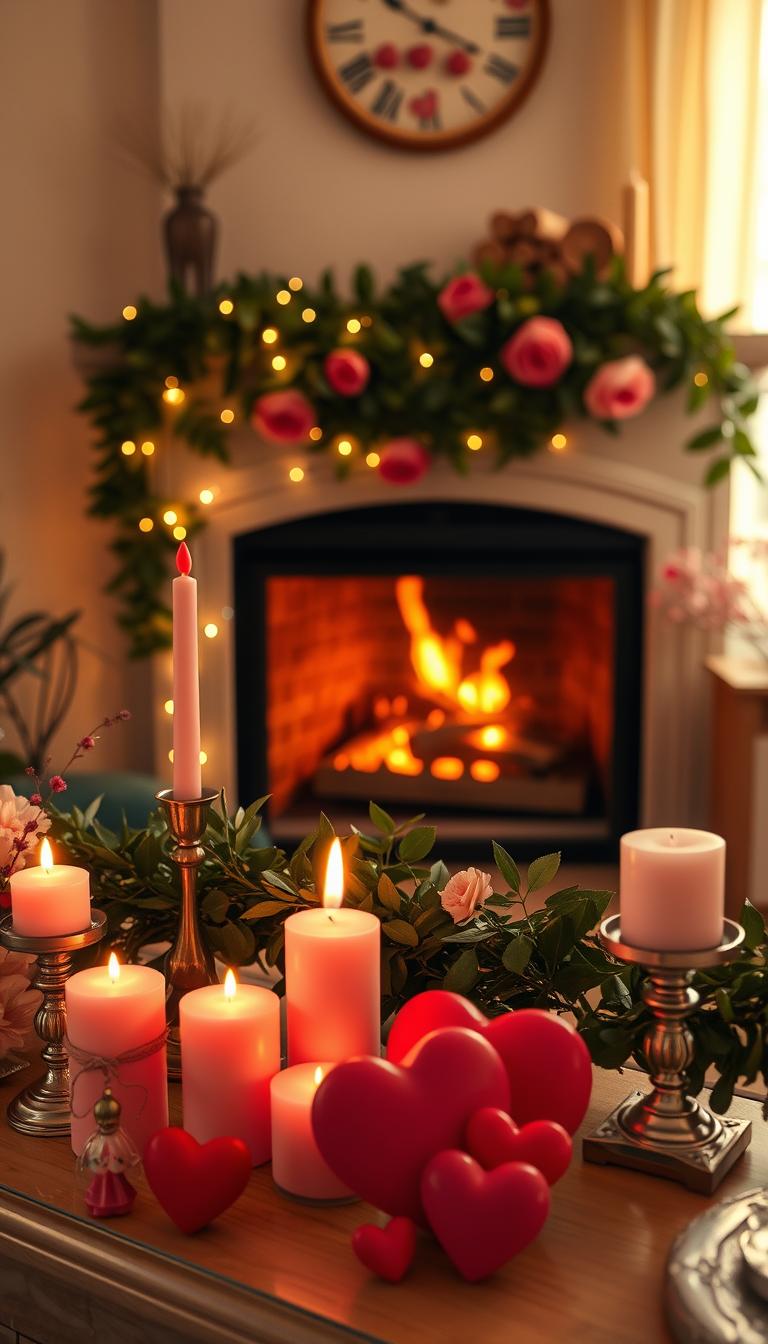
Florals and candlelight for romantic ambience
Soft blooms and low candlelight turn a shelf into a quiet, romantic vignette. I like to begin with a living focal piece that feels effortless and real. Fresh stems bring movement and scent, while flame adds a slow, calming rhythm.
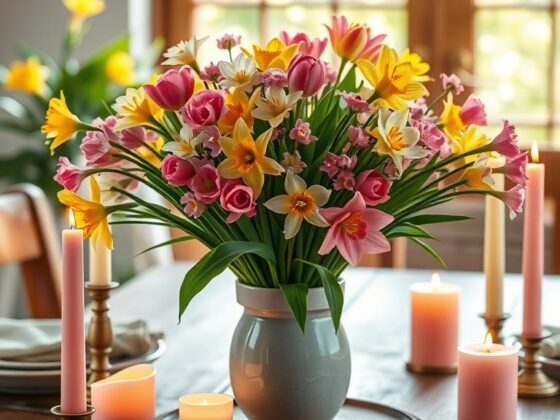
Fresh pink blooms in a “Love” vase as a focal point
I anchor the spot with a small “Love” vase filled with pink flowers—roses or tulips work beautifully. Place it near the center or slightly off-center to soften symmetry and keep the eye moving.

Pink candlesticks with tied bows for texture
Pair slim pink candlesticks with tiny ribbon bows for a tactile, playful touch. Stagger heights for rhythm and always use heat-proof bases so flames stay safe and away from garlands.
- Anchor: a Love-inscribed vase with pink blooms for elegance and movement.
- Green tie-in: tuck eucalyptus or waxflower to echo mantel greenery.
- Practical: refresh water every other day and recut stems at an angle so blooms last through valentine day.
| Item | Role | Quick tip |
|---|---|---|
| Roses/Ranunculus | Soft texture | Trim stems every 2 days |
| Pink candlesticks | Height & texture | Tie slim ribbon for whimsy |
| Vase | Focal anchor | Place center or just off-center |
If allergies are a concern: swap to faux blooms on the shelf and keep the real bouquet on a nearby table. Dim lights and candlelight finish the scene for dreamy day decor.
Whimsical sweets: fake cakes as playful focal points
A faux cake can become a playful sculpture that makes your shelf smile. I like to center one faux cake on a riser so it reads as a single, confident piece rather than a trinket.
Fake cake storage boxes are great repurposed decor. Their pastel colors and printed designs add a celebratory look and photograph beautifully. They store neatly when the season ends and pop right back into place next year.

Choose icing tones that echo your palette. A ruffled “buttercream” texture pairs nicely with soft greenery. Nestle the cake beside vintage dessert plates or a paper doily for a bakery-inspired vignette.
- One statement cake beats a cluster—let it shine with quieter accents.
- These pieces are lightweight and safe around kids and pets; they store well.
- Add a tiny banner topper or heart pick to tie it to your valentine day story.
- If you make one, keep finishes matte so the faux frosting reads real under lamplight.
Quick idea: center the cake on a cake stand, tuck eucalyptus or a single rose beside it, and step back. That playful moment invites smiles and lifts the room on a grey winter day.
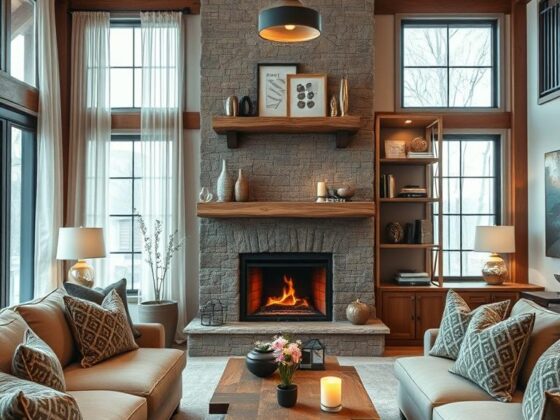
Minimalist, modern farmhouse, vintage rustic, or glam: choose your style lane
Choose a single aesthetic and let your small choices—metal, texture, and scale—do the talking. I find committing to a lane makes editing easy and the final look feel deliberate.

Modern farmhouse
Anchor with a mirror, line up gold candlesticks, and add a crisp “Love” sign. Clean lines and classy florals keep the look bright and welcoming.
Minimalist
Restrained hearts, negative space, and cohesive tones are the rules here. One vase, one candle, one small accent—let the emptiness speak.
Vintage rustic
Lean on thrifted candlesticks, an antique clock, and aged woods. Tuck in a few timeworn vintage prints to give the display soul.
Chic glam
Layer metallics, a shimmering garland, and an elegant print in a sleek frame. Choose a few luxe items so the shelf glows without clutter.
- Keep colors consistent within your lane; cohesion makes simple items read as intentional design.
- Edit ruthlessly—remove any items that don’t serve the story of your chosen style.
- Let your home’s architecture guide scale and finishes: warm metals suit stone surrounds; glass and contrast suit modern surrounds.
Budget-friendly sourcing and DIY hacks
You can get a high-end look by reworking things you already own. I shop my house first—frames, books, bowls, and old ceramics often transform with a quick clean or new ribbon.
Small tweaks matter: repaint a wood sign, add a bow to a neutral wreath, or swap a pillow cover for a pastel tone. I lean on Dollar Tree finds—felt hearts, paper doilies, and ribbon—then edit until the group reads intentional.
Quick hacks I use:
- Wrap tin foil around taper bases so candles sit snugly in vintage milk glass.
- Place a cake stand over a crock opening to make a steady pedestal for a wreath and candle.
- Watch for 50% sales at Hobby Lobby a few weeks before the holiday to score core pieces.

| Hack | Why it works | Tip |
|---|---|---|
| House hunt | Saves money | Group like colors |
| Dollar Tree crafts | Affordable accents | Edit to avoid clutter |
| Tin foil candle-fit | Safe fit for tapers | Hidden and secure |
After the season, I keep a small bin labeled “Valentine” and jot a short post-season note about what I used. It saves time, cuts waste, and makes next year easier.
Transition your winter mantel to Valentine’s Day with ease
Transitioning to a love-themed shelf should feel like layering a cozy throw, not redecorating the whole room. I keep the winter base—eucalyptus, white wood beads, and neutral candles—and add a few soft signals that a new season is near.
Small changes make a big difference. I tie salt-dough hearts to the existing garland so movement and meaning join the winter texture. The hearts are simple: flour, salt, water, baked, then finished with white chalk paint for a plaster-like look.
Wood bead heart crafts echo the garland’s texture and read homemade, not mass-produced. I usually swap one or two tapers for blush tones and add a single ribbon when the room runs cool.
- I keep winter decor in place and weave in heart accents for an easy shift.
- Salt-dough hearts painted with chalk paint pair well with white wood beads.
- Small edits — one candle or a new ribbon — let your home decor breathe.
The result is a day mantel that still feels winter-cozy but quietly announces valentine decor is here. A few thoughtful pieces keep the look calm and true to the room.
Styling principles that work every time
A strong center makes arranging the rest feel simple and intentional. I begin by choosing a clear focal point and then add height at the ends. That strategy keeps the mantel grounded and easy to edit.
Aim for balance, not strict symmetry
Set a clear center, then build outward so the display doesn’t drift. Balance beats mirror-image matching—it’s warmer and more natural.
Vary heights, weights, and textures across the span
Mix tall, airy branches with shorter, heavier pieces. Smooth glass, soft ribbon, and leafy greens work together so each element reads clearly.
Step back, edit, and layer from large to small
Place large elements first, then medium connectors, then the smallest sprinkles. Step back every few minutes and photograph the shelf to catch crowding or gaps.
“Remove one thing more than you think; negative space lets the good stuff breathe.”
- Set a clear center, then build outward.
- Mix heights and textures for a lived-in, balanced look.
- Edit bravely—a phone photo will tell you the rest.
| Action | Why | Quick Tip |
|---|---|---|
| Center first | Anchors the display | Pick one strong piece |
| Balance ends | Prevents visual drift | Add height on both sides |
| Layer small | Creates interest | Finish with sprinkles |
Valentine Mantel ideas you can finish in an afternoon
In an hour you can add texture, light, and a little charm to your day mantel. I love quick wins that feel handmade but polished.
Start small: make a simple heart garland from felt or paper and baker’s twine. It’s sweet, reusable, and kid-friendly.
Try a rope heart wreath as a Dollar Tree DIY—braid rope, hot-glue a simple frame, and add a tiny bow. Printable paper art in an inexpensive frame gives instant polish at nearly zero cost.
Fairy lights tucked under a garland create a soft evening glow. A bookpage banner laid across a mirror adds literary charm fast.
- Tie tiny ribbon bows to candlesticks for a five-minute texture boost.
- Group three small hearts at differing heights for a balanced vignette.
- Keep a small kit—scissors, tape, and string—so diy is always easy and tidy.
| Project | Time | Cost | Tip |
|---|---|---|---|
| Heart garland | 30–45 min | $5–$10 | Use baker’s twine for a neat hang |
| Rope heart wreath | 45–60 min | $8–$12 | Hot-glue in layers for clean edges |
| Printable art + bookpage banner | 15–30 min | $0–$8 | Frame with a mat for instant look |
Quick confidence tip: pick one project and finish it. Small steps create a home that feels cared for—fast.
Affiliate-friendly picks and timeless pieces that earn their keep
Pick pieces that work year-round and your seasonal refresh becomes easy, not wasteful. I favor items that move between cozy winter and bright spring with one small tweak.
Buy less, choose well: gold candlesticks, a neutral vase, and a lush greenery garland are my repeat performers. A clean-lined mirror also earns its keep—bouncing light and framing every look you style.
I recommend investing once in quality taper candles and rotating ribbon colors for different holidays. Printable art is your budget MVP—swap the print, keep the frame, and the shelf feels new.
When I share product choices I sometimes include affiliate links, and I only link to pieces I’d use at home. If you prefer browsing ideas first, check these seasonal decorating ideas for inspiration: seasonal decorating ideas.
- Choose one special piece per year to build a curated collection.
- Keep a small kit—ribbon, spare candles, and a neutral vase—for quick edits.
- Think beyond February—select decor that transitions into spring with minimal tweaks.
| Item | Why it lasts | Quick tip |
|---|---|---|
| Gold candlesticks | Timeless metal warms many palettes | Use for both dinner and decor |
| Neutral vase | Works with fresh or faux blooms | Change ribbon color seasonally |
| Quality garland | Reusable base for accents | Layer hearts, lights, or bows |
Common mistakes to avoid when decorating a Valentine mantel
Small choices make a big difference—so avoid easy missteps that undo the mood you worked for.
I see the same issues in client rooms. The first is skipping a strong center. Without a clear center, the whole display feels aimless. Start with one confident piece and build outward.
Clustering all bold pinks and reds on one side is another common error. Spread saturated colors so the eye moves across the shelf. That simple shift keeps the composition balanced and calm.
Overcrowding steals the peaceful feel. If the mantel looks busy, remove one or two items and see how it breathes. Less often reads as more.
Use proper support for garlands and bows. Flimsy tape will let a swag droop—secure with discreet hooks, floral wire, or strong yarn. That keeps pieces tidy and safe.
Candle safety matters. Keep flames clear of greenery and fabric. Use heat-safe holders and leave space above each taper so nothing singes or melts.
- Pick one focal piece first; don’t skip a center.
- Disperse saturated colors; don’t pile them on one side.
- Edit to avoid overcrowding—remove an item and reassess.
- Use hooks or wire for secure hanging; avoid weak tape.
- Keep candles clear of garlands, bows, and flammable decor.
- Limit metals to one primary finish plus one accent.
- Add height at the ends—candlesticks, branches, or stacked books.
- Step back and photograph the setup before you call it done.
| Problem | Why it matters | Quick fix |
|---|---|---|
| No focal point | Arrangement feels scattered | Place one strong center piece first |
| Color imbalance | Eye is pulled to one side | Distribute bold hues across the span |
| Poor hanging method | Garlands sag or fall | Use hooks, wire, or sturdy yarn |
| Unsafe candle placement | Fire risk and melted decor | Use heat-safe holders and clear space |
Conclusion
Finish with confidence: a few thoughtful layers make a shelf feel intentional and lived-in.
I followed a plan—foundation first, a clear center, balanced ends—and it works every time. Add DIY pieces, a sprinkling of vintage finds, soft florals, and candlelight to craft a cozy valentine day look that still feels calm.
Keep edits gentle: reuse what you have, invest where it counts, and let color whisper instead of shout. Small swaps make your valentine mantel meaningful without fuss.
The best result is one you enjoy daily—morning coffee, evening glow. Try one new idea this week and save the rest. You’ll step back, smile, and know you nailed the look and the feeling of love in your home decor.