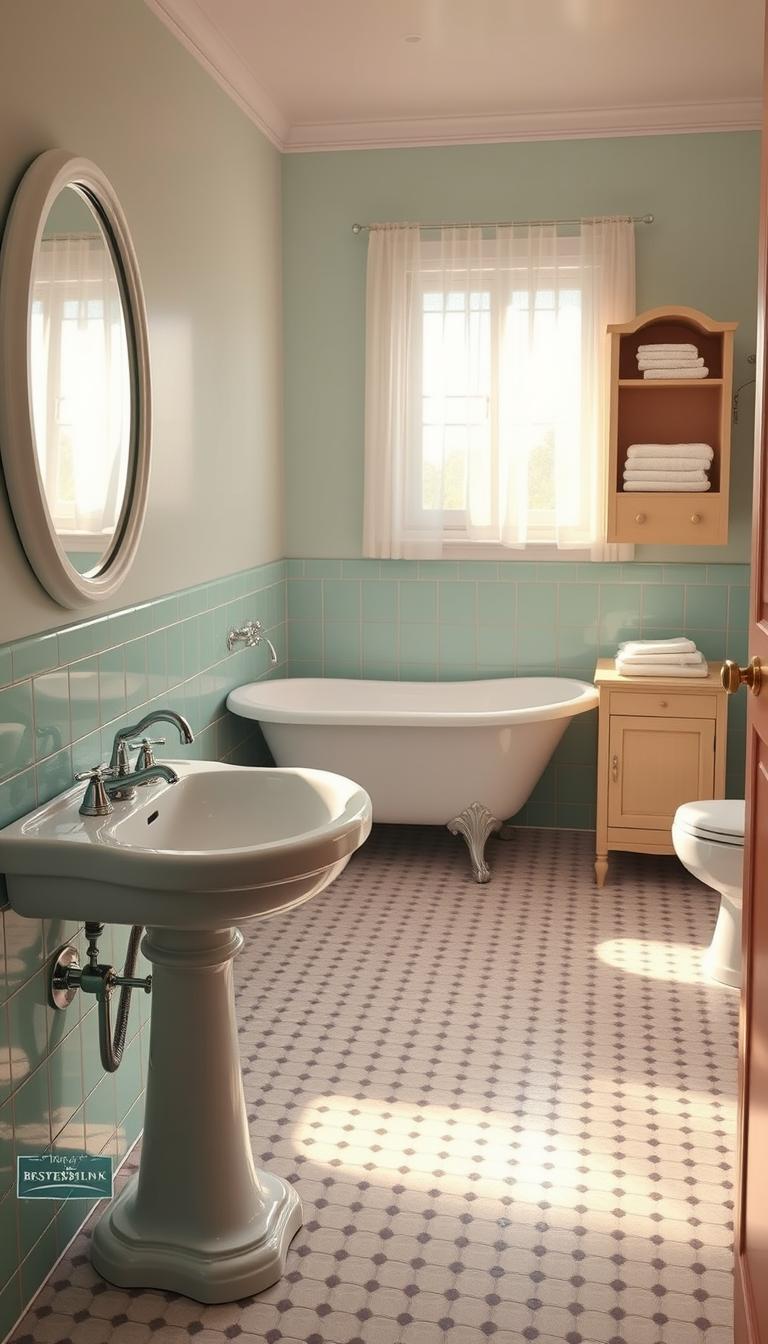
Can a few smart swaps turn a cramped mid-century bath into a calm, modern retreat? I ask that because I’ve seen small moves deliver big change in old houses.
I’ll walk you through real renovations where removing a low soffit, adding a frameless glass shower door, and choosing darker grout made a tight space feel wider and cleaner. I use those wins first—ventilation, safe outlets, and layout—before picking pretty finishes.
You’ll read about practical fixes: exhaust fan/light combos, new GFCI outlets, and replacing cracked tile or worn linoleum. I’ll show budget-friendly options, like marble-look wall tile under $2 per square foot, and tactile details—basketweave floors, pencil trim—that honor the 1950s character.
By the end, you’ll have a clear, step-by-step plan to transform a small room into a serene space that fits your home and daily life.
Key Takeaways
- Start with function: ventilation, outlets, and layout first.
- Small layout changes can add major usable space.
- Frameless glass and darker grout refresh the look without losing charm.
- Budget marble-look tile gives luxe results for less.
- Safety upgrades—GFCI and proper ventilation—are non-negotiable.
- Finishing touches, like trim and hardware, elevate daily rituals.
Start Smart: Assessing Your 1950 Bathroom and Setting a Remodel Plan
I start every project with exact measurements. Tape, sketch, and note ceiling height, slanted exterior walls, and any low bulkheads. Those simple numbers show what will fit and what needs to move.
Measure and map the bones
I map each wall, window, vent, and the location of fixtures. Measure clearances around the toilet and vanity to confirm comfortable pass-by space. In several 1950s remodels this step uncovered reclaimable hallway inches and plumbing shifts that gained real space.
Code, ventilation, and outlets
Plan an exhaust fan/light combo on its own switch to clear moisture fast. If your home has no outlets, budget for GFCI-protected circuits at the vanity. Document vent routes and the shortest electrical tie-in to avoid surprises.
Fix traffic flow
- Sketch movement: note where a door hits a toilet or blocks a fixture.
- Flag awkward openings: moving one door or a short wall often unlocks better function.
- Record opportunities: reclaiming 30 inches from a hallway or shifting a tub wall can change the whole layout.
Measure first, then plan—it’s the surest way to save money and get a layout that feels right for daily life and future renovation work.
Gutting and Reworking the Layout for More Space and Better Function
A clean demo day turns mystery walls and soft floors into a clear plan of action. I ask crews to strip the room down so we can see plumbing, wiring, and any hidden rot. That visibility drives smart choices fast.

Down to the studs: pull out cracked tiles, spongy linoleum floor, and tired fixtures. When everything is open, you can assess pipe runs and wiring age and decide if full updates are due while the walls are accessible.
- I’ve seen a project gain about 4 feet by removing a dining room wall — suddenly a standard tub and full-size vanity fit comfortably.
- Other times, shifting a wall roughly 30 inches into a quiet hallway gave room for a custom vanity and better toilet spacing.
Before moving any wall, confirm structural impacts. Often shifting an opening or moving a door is enough to improve traffic flow without a heavy rebuild.
Relocate plumbing to the most efficient wall and install cement backer board (Durock) at wet zones before tiling. Plan vent routes early — if the house had no fan, now’s the day to add one.
- Keep debris out of living areas with staging so the project moves smoothly.
- Run new supply and drain lines while walls are open; add an exhaust fan/light and GFCI circuits as needed.
For a quick guide on staging and project logistics, I also recommend checking a helpful resource on project planning before demo day.
Shower vs. Tub: Choose the Right Bath Zone for a Mid-Century Home
Choosing between a tub and a walk-in shower shapes how a small mid-century space feels and functions. I like to match the choice to daily habits first, then the room’s proportions.

Walk-in shower: One homeowner removed their tub and installed frameless glass, darker grout, a built-in seat, and a shelf. The result? The room felt larger and aired out instantly. Frameless glass reads light and modern, while darker grout hides wear and frames your tile and walls.
Soaking tub: Another client kept a tub and upgraded to a deeper soaking model with a marble-look custom surround and a recessed niche. That approach keeps the vintage soul while adding daily luxury.
- I guide clients by habit: unused tubs often become visual clutter; a shower frees space.
- Keep niches at chest height and size them for your tallest bottle — small choices feel custom.
- Consider a low bench or ledge for safety and comfort in either option.
- Tie finishes to adjacent rooms so the new zone complements the home’s overall design and look.
Tile, Walls, and Floors: Budget-Friendly Mid-Century Updates with Classic Style
A smart tile plan can make a small mid-century room feel like it has more breathing room and far more polish.
Carrara-look marble and basketweave are my go-to. I’ve specified a Carrara-look wall tile with a basketweave border on the floor to give a luxe yet calm vibe. One client used marble-look tiles priced near ceramic and the result read custom, not bargain.

Make one material do the heavy lifting
Running one tile across the walls and floor lowers waste and makes the space read larger. The continuous plane stops the eye and simplifies cleaning.
Trim, texture, and backer board
Pencil trim and a chair rail frame the field and honor the 1950s envelope. Use cement backer board in wet zones and prime the rest so your paint color stays true.
“Seek marble-look tile around $1.50 per square foot for a high-end look without the upkeep.”
- Shiplap on one accent wall adds texture and widens the sightline.
- Mix matte walls, satin trim, and a lightly sheened tile to avoid glare under bright lights.
- For more tile-floor ideas, see a curated board on tile floor inspiration, and check styled layout patterns at styled blocks.
Bottom line: a few thoughtful choices—matching tile, classic trim, and a shiplap accent—deliver a cohesive design that feels both fresh and true to the era.
Lighting, Plumbing, and Fixtures: Modern Performance with Transitional Design
Bright, layered light plus well-planned plumbing turns daily chores into calm rituals. I’ve seen a small post-renovation room feel larger simply by rethinking wiring and fixtures.

I ask electricians to run new lines for an exhaust fan/light combo and separate circuits for vanity lights. One job even needed a fourth sconce to balance the wall. The result: faces read true at the mirror and the room feels even at night.
Vanity lighting and mirror placement
I layer light — ambient, task, and accent — so the mirror gives a natural view without glare.
Pro tip: mid-century-inspired bars or globe sconces keep the look classic while delivering modern performance.
Plumbing moves and durable hardware
Rerouting supply and drain to a logical wall cuts future service headaches the easy way. Many clients chose nickel fixtures for durability and a clean, transitional feel.
A hand shower paired with a soaking tub or shower niche adds real daily payoff for rinsing pets and cleaning grout.
Key choices at a glance:
| Component | Benefit | Typical Spec | Best For |
|---|---|---|---|
| Exhaust fan/light combo | Controls moisture, adds overhead light | CFM sized to room; low sones (≤1.5) |
Small baths needing ventilation |
| Vanity sconces / bar | Even, flattering task light | 2700–3000K; dimmable | Mirror and grooming areas |
| Nickel fixtures | Wear-resistant, easy to clean | Solid brass base; brushed finish | Transitional 1950s-style updates |
“Keep lighting on separate switches — control is comfort.”
- Specify an exhaust fan rated for your room’s cubic feet per minute and low noise.
- Widen or add a sconce if the mirror feels dim — proportion matters in a compact room.
- Leave access panels for future service and keep fixtures on logical circuits.
Storage, Vanity, and Mirrors: Make Every Inch of a Small Bathroom Work
Smart storage and a well-sized vanity change how a compact bathroom behaves every day. I aim for practical solutions that read calm and tidy.
I often specify a 36″ single-sink vanity with full-depth drawers. Drawers beat deep cabinets for daily reach under a sink. One client kept the standard tub by moving a linen closet into the hallway. That kept the tub and gained useful floor plan breathing room.
When inches are tight, consider nudging a wall a few inches or shifting a door swing. In one remodel we moved a wall ~30 inches into a hallway and installed a custom vanity that fit perfectly.
A frameless nickel mirror and matching hooks make the room feel brighter without clutter. Use open shelves above the toilet in a warm wood tone — they’re friendly, visible storage you’ll actually use.
Tip: match hardware from lever to pulls for a composed look. Measure door swing against the vanity first — a small change avoids daily headaches and makes the space work.

Quick comparison
| Solution | Benefit | Best for | Notes |
|---|---|---|---|
| 36″ single-sink vanity with drawers | Easy access, organized small items | Small to mid-size bathrooms | Fits standard sinks; good stock option |
| Custom wider vanity after wall shift | Maximizes counter and under-counter space | When modest wall moves are possible | Higher cost; tailored fit |
| Hallway linen closet relocation | Preserves tub footprint; adds hallway storage | Homes where tub retention matters | Keeps wet zone clear of linens |
| Open shelving + frameless mirror | Vertical storage; bright, uncluttered feel | Tiny rooms needing visual lift | Use warm wood and coordinated hardware |
“Small decisions—drawer layout, mirror size, closet placement—add up to a bathroom that feels effortless.”
For more space-saving ideas and practical plans, see a round-up of small bathroom renovation ideas.
Conclusion
Conclusion: I keep this simple—start with how the room works, then add the look. Focus on door clearances, toilet spacing, and whether a shower or tub suits daily life. Those decisions change a remodel more than any single finish.
Let tile and trim do the lifting. Run one tile across walls and the floor when you can, add a marble-look border or pencil rail for soul, and choose fixtures that last. Frameless glass and a quiet fan make a small shower feel generous and fresh.
One last thought: measure twice, plan your wiring and GFCI protection, then live in the space a day before the final mirror, paint, or shelf. You’ll pick the details with more confidence—and more joy by hand.